
how to install a pump in a residential system
To begin the pump installation process, it is essential to thoroughly assess your system’s needs. This involves evaluating several key factors to ensure that the chosen pump will operate efficiently within your residential setup.
Water Demand: Determine the peak water usage in your household. Consider the number of occupants and the typical water-consuming activities, such as bathing, laundry, and cooking.
Flow Rate Requirements: Calculate the required flow rate, measured in gallons per minute (GPM), to meet your household’s demands. Ensuring the pump can handle simultaneous water usage without significant pressure drops is crucial for consistent performance.
Pressure Requirements: Assess the desired pressure levels for your system, typically measured in pounds per square inch (PSI). Adequate pressure is necessary for effective water delivery throughout your home.
System Type: Identify the type of water system you have, such as a well, municipal supply, or a combination. Each system type may have different requirements and considerations for pump installation.
Existing Infrastructure: Evaluate the current plumbing and electrical systems to ensure compatibility with the new pump. This includes checking pipe sizes, electrical capacity, and any existing pressure tanks or controls.
Usage Patterns: Analyze the daily and seasonal variations in water usage. Understanding these patterns can help in selecting a pump that accommodates fluctuations without compromising performance.
Regulatory Guidelines: Ensure compliance with local building codes and regulations related to pump installation. This includes obtaining necessary permits and adhering to safety standards.
| Assessment Factor | Description |
|---|---|
| Water Demand | Estimate the total water usage during peak times. |
| Flow Rate | Determine the GPM required to meet household needs. |
| Pressure | Identify the PSI needed for optimal water delivery. |
| System Type | Understand the source and configuration of your water supply. |
| Infrastructure | Check compatibility with existing plumbing and electrical systems. |
| Usage Patterns | Analyze how water usage varies over time. |
| Regulatory Guidelines | Comply with local codes and obtain necessary permits. |
- Consult with a professional to accurately assess your water needs.
- Use flow meters and pressure gauges to measure current system performance.
- Document all findings to guide the selection of an appropriate pump.
By meticulously evaluating these aspects, you can ensure that the pump installation meets the specific requirements of your residential system, providing reliable and efficient water delivery.
selecting the right pump
When choosing a pump for your residential system, it is crucial to consider various factors to ensure optimal performance and longevity. Selecting the right pump involves understanding the different types available, their specific features, and how they align with your system’s requirements.
Types of Pumps:
There are several types of pumps suitable for residential use, each with its own advantages and applications. The most common types include:
| Pump Type | Description | Best For |
|---|---|---|
| Submersible Pumps | Designed to operate underwater, typically used in wells. | Deep well systems and areas with high water tables. |
| Jet Pumps | Mounted above ground, suitable for shallow and deep wells. | Homes with varying well depths requiring versatile solutions. |
| Booster Pumps | Increase water pressure within the existing system. | Properties experiencing low water pressure issues. |
| Centrifugal Pumps | Use a rotating impeller to increase water flow. | General residential water supply needs. |
| Pressure Pump Systems | Maintain consistent water pressure by regulating pump activity. | Homes requiring stable and reliable water pressure. |
Key Features to Consider:
When selecting a pump, evaluate the following features to ensure it meets your system’s demands:
- Flow Rate: Ensure the pump can deliver the required gallons per minute (GPM) to handle your household’s peak water usage.
- Pressure Rating: Verify that the pump can maintain the necessary pounds per square inch (PSI) to ensure adequate water pressure throughout your home.
- Energy Efficiency: Opt for pumps with high energy efficiency ratings to reduce electricity consumption and operational costs.
- Durability and Build Quality: Choose pumps made from robust materials that can withstand the demands of continuous operation in a residential setting.
- Noise Levels: Consider the noise output, especially if the pump will be installed near living areas.
- Control Systems: Advanced control systems can provide better regulation of water pressure and flow, enhancing overall system performance.
Capacity and Sizing:
Proper sizing is critical for effective pump installation. An undersized pump may struggle to meet your water demands, while an oversized pump can lead to unnecessary energy usage and increased wear and tear. Use the assessment data from the previous section to match the pump’s capacity with your system’s requirements.
Brand Reputation and Warranty:
Selecting a pump from a reputable manufacturer ensures reliability and access to quality customer support. Additionally, a strong warranty can provide peace of mind and protection against potential defects or failures.
Installation Guidelines:
Adhering to installation guidelines specific to the pump type is essential for optimal performance. This includes proper placement, secure mounting, and correct electrical connections. Consulting with a professional can help navigate these guidelines effectively.
- Review manufacturer recommendations for installation and maintenance.
- Ensure compatibility with existing plumbing and electrical systems.
- Consider future scalability and potential system upgrades.
By carefully evaluating these factors, you can select a pump that not only meets your current residential water needs but also provides reliable performance for years to come, ensuring a successful pump installation.
gathering necessary tools and materials
To ensure a smooth and efficient pump installation process, it is crucial to gather all necessary tools and materials beforehand. Being well-prepared minimizes downtime and reduces the risk of encountering issues during installation. Below is a comprehensive list of items typically required for installing a pump in a residential system, along with guidelines to help you organize and verify your supplies.
Essential Tools:
- <strong.Wrench Set: A variety of wrenches, including adjustable and pipe wrenches, are necessary for tightening and loosening fittings.
- <strong.Screwdrivers: Both flathead and Phillips screwdrivers are needed for securing electrical connections and mounting brackets.
- <strong.Pipe Cutter: Used to accurately cut plumbing pipes to the required lengths.
- <strong.Teflon Tape: Applied to threaded connections to prevent leaks.
- <strong.Electrical Multimeter: Essential for verifying electrical connections and ensuring proper voltage levels.
- <strong.Pliers: Useful for gripping and manipulating small components.
- <strong.Drill and Bits: Necessary for creating mounting holes and securing the pump unit.
- <strong.Level: Ensures that the pump is installed horizontally to operate correctly.
- <strong.Measuring Tape: For precise measurements of pipe lengths and installation placement.
- <strong.Cleanup Supplies: Rags, brushes, and cleaning agents to prepare surfaces and maintain a tidy workspace.
Necessary Materials:
- <strong.Pipes and Fittings: Depending on your system, you may need PVC, copper, or galvanized pipes, along with appropriate fittings for connections.
- <strong.Electrical Wiring: Ensure you have the correct gauge and type of wiring suitable for your pump’s electrical requirements.
- <strong.Pump Housing: The main unit that contains the pump mechanism.
- <strong.Pressure Tank (if not already present): Helps in maintaining consistent water pressure.
- <strong.Valves: Includes shut-off valves and check valves to control water flow and prevent backflow.
- <strong.Mounting Hardware: Bolts, nuts, and brackets necessary for securing the pump in place.
- <strong.Sealing Materials: Gaskets and sealants to ensure airtight and watertight connections.
- <strong.Control Switch: Automates pump operation based on water pressure levels.
- <strong.Cabling and Connectors: For establishing electrical connections between the pump and the power source.
Recommended Supplies:
| Supply Item | Purpose |
|---|---|
| Wire Nuts | Secure electrical connections. |
| Electrical Tape | Insulate and protect wire connections. |
| Seal joint connections in PVC piping. | |
| Acrylic Caulk | Seal gaps and prevent water ingress. |
| Flow Meter | Measure water flow rates during testing. |
Preparation Guidelines:
- <strong.Plan Your Layout: Sketch the placement of the pump, pressure tank, and piping to ensure all components fit within your designated space.
- <strong.Check Compatibility: Verify that all tools and materials are compatible with your existing plumbing and electrical systems.
- <strong.Announce Safety Measures: Turn off the main water supply and electrical power before beginning installation to prevent accidents.
- <strong.Assemble Components: Organize tools and materials in the order they will be used, enhancing efficiency during installation.
- <strong.Verify Inventory: Double-check that you have all necessary items to avoid interruptions during the installation process.
By meticulously assembling the required tools and materials, you set a solid foundation for a successful pump installation. Adhering to these guidelines not only facilitates a streamlined installation process but also ensures that your residential water system operates reliably and efficiently.
installing the pump unit
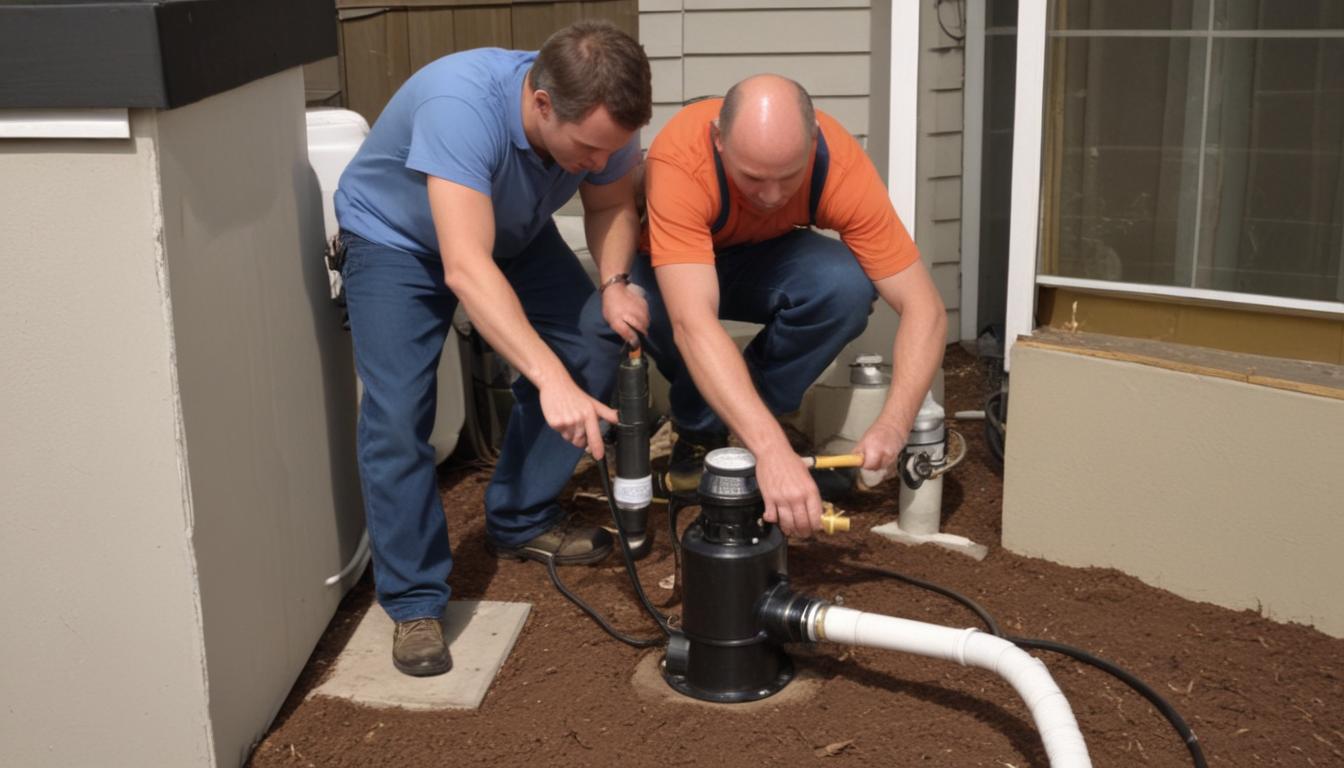 Begin by positioning the pump in the designated area, ensuring it is on a stable and level surface to prevent vibrations and potential movement during operation. Use a level tool to verify the surface is even, which is crucial for the pump’s efficiency and longevity.
Secure the pump unit using appropriate mounting hardware. Typically, this involves bolting the pump to the surface with brackets or mounts provided by the manufacturer. Refer to the manufacturer’s installation guidelines to determine the correct type and placement of mounting hardware to ensure stability and minimize noise.
Next, connect the plumbing lines to the pump. Start by attaching the inlet pipe to the bottom of the pump unit. Use Teflon tape on threaded connections to prevent leaks. Ensure all fittings are tightened securely but avoid over-tightening, which can damage pipes and fittings. If using PVC piping, apply PVC primer and cement to create watertight seals.
Following the inlet connection, attach the outlet pipe to the top of the pump. Similar to the inlet, apply Teflon tape to threaded connections and ensure all fittings are securely tightened. It is advisable to use check valves in the outlet line to prevent backflow, which can cause damage to the pump and disrupt system pressure.
Proceed to establish the electrical connections. Ensure that the power is turned off at the main breaker before starting any electrical work. Connect the pump’s wiring to the control switch according to the manufacturer’s wiring diagram. Use wire nuts and electrical tape to secure and insulate all connections, ensuring there are no exposed wires. Verify all connections are tight and free from potential short circuits.
Install any additional components such as a pressure tank if your system requires one. Connect the pressure tank inline with the pump using appropriate fittings and ensure it is properly secured. This component helps maintain consistent water pressure and reduces the frequency of pump cycling, enhancing the system’s efficiency.
To prevent water ingress and ensure all connections are watertight, apply acrylic caulk around all external joints and fittings. This step is vital for maintaining system integrity and preventing leaks that could lead to water damage or reduced pump performance.
Once all connections are made, perform a final inspection to ensure that all plumbing and electrical connections are secure and compliant with local building codes. Double-check that all components are properly mounted and that there are no obstructions or potential hazards in the installation area.
| Installation Step | Description | Tools/Materials Needed |
|---|---|---|
| Positioning | Place the pump on a stable, level surface. | Level tool, mounting brackets |
| Mounting | Secure the pump using appropriate hardware. | Bolt, screws, mounting hardware |
| Plumbing Connections | Connect inlet and outlet pipes with Teflon tape or PVC cement. | Pipes, fittings, Teflon tape, PVC primer and cement |
| Electrical Wiring | Connect the pump to the control switch and power source. | Wire nuts, electrical tape, multimeter |
| Sealant Application | Apply caulk to all external joints to prevent leaks. | Acrylic caulk, caulking gun |
| Final Inspection | Verify all connections and secure all components. | None |
Safety Precautions:
- Always turn off the main water supply and electrical power before starting the installation to prevent accidents.
- Wear appropriate personal protective equipment (PPE), such as gloves and safety glasses, to protect against injuries.
- Ensure all electrical connections comply with local codes and standards to avoid electrical hazards.
- Use proper lifting techniques or assistance when handling heavy pump units to prevent physical strain or injury.
Adhering to Manufacturer Guidelines:
It is imperative to follow the specific manufacturer guidelines provided with your pump model. These guidelines offer detailed instructions tailored to the pump’s design and functionalities, ensuring optimal performance and preventing voiding of warranties. Key aspects include:
- Proper alignment of pump components to reduce wear and tear.
- Recommended torque settings for bolts and fittings to ensure secure connections.
- Specific electrical requirements, including voltage and grounding instructions.
- Maintenance schedules to keep the pump operating efficiently.
Final Steps:
After completing the installation, perform a thorough check to ensure all connections are secure and there are no potential leak points. Restore the main water supply and electrical power, then slowly turn on the system to allow the pump to prime and begin operation. Monitor the pump closely during the initial run to identify and address any issues promptly.
By meticulously following these steps and adhering to established guidelines, you ensure a successful pump installation that provides reliable and efficient performance for your residential water system.
testing and troubleshooting
After completing the installation of the pump unit, the next crucial phase involves verifying that the system operates correctly and efficiently. This process ensures that the pump installation meets all the necessary requirements for your residential system and helps identify and resolve any potential issues early on.
Initial Testing Procedures:
Begin by restoring the main water supply and electrical power to the system. Slowly open any shut-off valves to allow water to flow into the pump. Observe the pump as it starts to operate, ensuring that it begins to draw water without any unusual noises or irregularities.
- Prime the Pump: Ensure the pump is properly primed by allowing air to escape from the system. An unprimed pump may fail to draw water effectively.
- Monitor Start-Up: Watch for smooth startup without excessive vibrations or noises, which could indicate misalignment or installation issues.
- Check for Immediate Leaks: Inspect all connections and fittings for any signs of water leakage during the initial operation.
Checking for Leaks:
Leaking connections can lead to water waste and damage to the system components. Perform a thorough inspection of all plumbing connections, fittings, and seals.
- Visual Inspection: Look for water droplets or moisture around all joints and fittings.
- Pressure Test: Use a pressure gauge to ensure the system maintains consistent pressure without drops that might indicate leaks.
- Seal Verification: Confirm that all caulk and sealants are intact and properly applied to prevent ingress of water where it should not be.
Verifying Electrical Connections:
Proper electrical connections are essential for the safe and efficient operation of the pump. Use an electrical multimeter to verify that all connections are secure and that the pump is receiving the correct voltage.
| Step | Description | Tools Needed |
|---|---|---|
| Power On | Turn on the electrical power and ensure the pump receives the correct voltage. | Electrical Multimeter |
| Continuity Check | Verify the continuity of all electrical connections to prevent short circuits. | Multimeter, Wire Nuts |
| Grounding Assurance | Ensure the pump is properly grounded to prevent electrical hazards. | Multimeter |
Ensuring Proper Pressure and Flow Rates:
Accurate pressure and flow rates are vital for the system’s efficiency. Utilize flow meters and pressure gauges to measure and confirm that the system meets the predefined specifications.
- Flow Rate Verification: Use a flow meter to measure the gallons per minute (GPM) and ensure it aligns with the system’s requirements.
- Pressure Monitoring: Check that the pressure levels remain within the desired range (PSI) to ensure consistent water delivery.
- Adjustments: Make any necessary adjustments to the pressure settings or pump speed based on the measurements obtained.
Troubleshooting Common Issues:
Despite careful installation, various issues might arise during testing. Addressing these promptly ensures the longevity and reliability of the pump system.
| Issue | Possible Cause | Solution |
|---|---|---|
| Pump Not Starting | Electrical connection problem or faulty control switch. | Check all electrical connections and replace the control switch if necessary. |
| Low Water Pressure | Clogged pipes, undersized pump, or pressure tank issues. | Inspect and clean pipes, verify pump size, and check the pressure tank functionality. |
| Unusual Noises | Misalignment, air in the system, or worn bearings. | Realign pump components, purge air from the system, and inspect bearings for wear. |
| Leaks Detected | Improperly sealed connections or damaged fittings. | Tighten connections, reapply sealants, or replace damaged fittings. |
Using Diagnostic Tools:
Employing the right tools can significantly streamline the troubleshooting process. Key diagnostic tools include:
- Multimeter: Essential for checking electrical connections and ensuring proper voltage supply.
- Flow Meter: Measures the actual flow rate to verify against system requirements.
- Pressure Gauge: Monitors the system’s pressure levels in real-time.
- Leak Detection Kits: Helps identify unseen leaks within the plumbing system.
Steps to Address Identified Problems:
- Identify the Issue: Use diagnostic tools and visual inspections to pinpoint the exact problem.
- Analyze the Cause: Determine the underlying cause of the issue, whether it’s electrical, mechanical, or related to water flow.
- Implement Solutions: Apply the appropriate fix based on the identified cause, such as tightening connections, replacing faulty components, or adjusting settings.
- Retest the System: After addressing the issue, perform another round of testing to ensure the problem has been resolved.
- Document the Process: Keep records of the issues encountered and the solutions applied for future reference and maintenance purposes.
Safety Measures During Testing and Troubleshooting:
Maintaining safety is paramount during the testing and troubleshooting phase. Follow these precautions to ensure a safe working environment:
- Power Off When Necessary: Always turn off electrical power before handling any electrical components to prevent shocks or short circuits.
- Use Protective Gear: Wear appropriate personal protective equipment (PPE), such as gloves and safety glasses, to protect against injuries.
- Avoid Water Exposure to Electrical Parts: Ensure that all electrical connections are dry and insulated to prevent electrical hazards.
- Follow Manufacturer Guidelines: Adhere to all safety instructions and recommendations provided in the pump’s manual.
Final Verification:
Once all tests and troubleshooting steps are completed, perform a comprehensive verification to ensure that the entire system operates smoothly and efficiently.
- Operational Stability: Observe the pump’s performance over an extended period to ensure consistent operation without fluctuations.
- Pressure Consistency: Verify that the system maintains stable pressure levels under varying water demands.
- Flow Assurance: Confirm that the water flow rate remains steady and meets the household’s needs.
- Leak-Free Operation: Ensure that there are no ongoing leaks or moisture issues within the system.
By diligently performing these testing and troubleshooting steps, you can ensure that your residential pump installation operates reliably and efficiently. Addressing any issues promptly not only enhances the system’s performance but also extends the lifespan of your pump, providing peace of mind and consistent water delivery for your household.