how to install a centrifugal pump
Selecting the right pump is a crucial first step in ensuring the success of any centrifugal pump installation. This process involves a thorough analysis of the system requirements and understanding the specific characteristics of the fluid to be pumped. Adhering to established guidelines can streamline the selection process and enhance the pump’s performance and longevity.
Key Factors to Consider:
- Flow Rate: Determine the volume of fluid that needs to be moved per unit of time, typically measured in gallons per minute (GPM) or liters per second (L/s).
- Head Requirements: Assess the total dynamic head (TDH), which includes the vertical lift, friction losses in the piping, and any other factors that contribute to the resistance against the pump’s operation.
- Fluid Properties: Understand the viscosity, temperature, density, and any corrosive or abrasive characteristics of the fluid to ensure material compatibility and optimal pump performance.
- Operating Conditions: Consider the environmental conditions, such as ambient temperature and potential exposure to hazardous locations, which may influence the pump’s design and material selection.
- Energy Efficiency: Evaluate the pump’s efficiency to minimize energy consumption and operational costs over its lifespan.
Steps to Select the Appropriate Pump:
- Define System Requirements: Clearly outline the desired flow rate and head needed for the application.
- Analyze Fluid Characteristics: Gather detailed information about the fluid, including its physical and chemical properties.
- Evaluate Pump Types: Compare different centrifugal pump models based on efficiency, materials, and suitability for the specific application.
- Size the Pump: Use pump selection charts or software tools to match the flow rate and head with the appropriate pump size.
- Consider Future Needs: Anticipate any potential changes in the system that may require a pump with adjustable or scalable features.
- Review Manufacturer Specifications: Ensure that the selected pump meets all operational and performance criteria as specified by the manufacturer.
Comparison of Common Centrifugal Pump Types:
| Type | Advantages | Applications |
|---|---|---|
| Single-Stage | Simple design, cost-effective | Low to medium head applications |
| Multi-Stage | Higher head capabilities, increased pressure | High head requirements, boiler feed water |
| Self-Priming | Can handle dry starts, easy installation | Sewage, wastewater treatment |
| Vertical | Space-saving, suitable for deep wells | Municipal water supply, irrigation |
By carefully evaluating these factors and following a systematic selection process, you can ensure that the chosen centrifugal pump will effectively meet the demands of your specific application, leading to a successful installation and reliable operation.
preparing the installation site
Proper preparation of the installation site is essential to ensure a seamless and efficient centrifugal pump installation. This phase involves assessing and readying the physical location where the pump will operate, addressing environmental factors, and ensuring that all necessary infrastructure is in place.
Key Considerations:
- Location Selection: Choose a site that provides easy access for maintenance and operation. The area should be free from obstructions and offer sufficient space around the pump for installation and future servicing.
- Foundation and Support: Ensure that the installation site has a stable foundation capable of supporting the pump’s weight and operational vibrations. Utilize a concrete base or a vibration isolation pad to minimize movement and noise.
- Environmental Conditions: Consider factors such as temperature, humidity, and exposure to elements. If the pump is to be installed outdoors, implement protective measures like shelters or enclosures to safeguard against weather-related damage.
- Power Supply: Verify that the site has a reliable power source compatible with the pump’s electrical requirements. This includes checking voltage levels, phase configurations, and ensuring adequate power capacity to support the pump’s operation.
- Accessibility: Ensure that the pump is easily accessible for routine inspections, maintenance, and emergency interventions. Clear pathways and adequate lighting can enhance safety and efficiency.
- Drainage and Ventilation: Implement proper drainage systems to handle any potential leaks or spills. Good ventilation is also necessary to prevent overheating and maintain optimal operating temperatures.
Steps to Prepare the Installation Site:
- Conduct a Site Survey: Perform a thorough inspection of the proposed location to identify any potential challenges or requirements specific to the environment.
- Design the Layout: Plan the arrangement of the pump, motors, piping, and ancillary equipment. Ensure that the layout adheres to industry standards and manufacturer recommendations.
- Install the Foundation: Construct a sturdy foundation that aligns with the pump’s specifications. This may involve pouring concrete or setting up pre-fabricated bases.
- Set Up Electrical Connections: Install necessary electrical infrastructure, including wiring, breakers, and control panels, ensuring compliance with safety codes and standards.
- Prepare Piping Infrastructure: Lay out and install the piping system, ensuring proper alignment and support to accommodate the pump’s operation and minimize stress on connections.
- Ensure Safety Measures: Implement safety protocols such as emergency shut-off switches, signage, and protective barriers to safeguard personnel and equipment.
Equipment and Tools Required:
| Equipment | Purpose |
|---|---|
| Concrete Mixer | To prepare and pour the foundation base |
| Leveling Tools | To ensure the foundation and pump are perfectly level |
| Electrical Testing Equipment | To verify power supply and electrical connections |
| Pipe Alignment Tools | To accurately align and secure piping connections |
| Safety Gear | To protect personnel during installation |
Adhering to these guidelines and systematically preparing the installation site will facilitate a smooth setup process, reduce the likelihood of operational issues, and contribute to the overall longevity and efficiency of the centrifugal pump system.
assembling the pump components
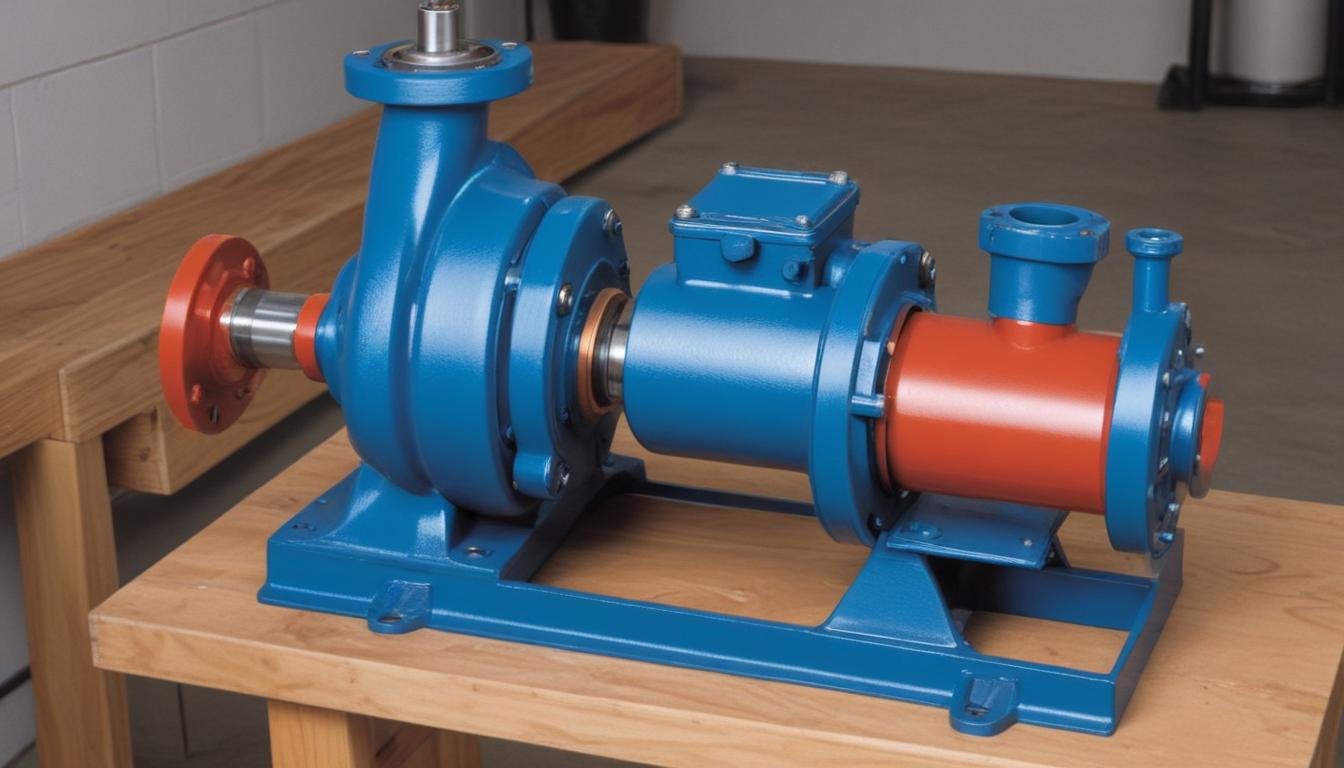
Properly assembling the pump components is a critical phase in the centrifugal pump installation, ensuring that each part operates harmoniously to deliver efficient performance. Adhering to established guidelines during assembly minimizes the risk of operational issues and extends the pump’s lifespan.
Key Components:
- Impeller: The rotating component that imparts energy to the fluid, creating flow and pressure.
- Shaft: Connects the impeller to the motor, transmitting rotational force.
- Bearings: Support the shaft, ensuring smooth rotation and reducing friction.
- Seal Assembly: Prevents fluid leakage along the shaft, maintaining system integrity.
- Casing: Encloses the impeller and directs the fluid flow through the pump.
- Base Plate: Provides a stable foundation for mounting the pump assembly.
- Coupling: Connects the pump shaft to the motor, allowing rotational motion transfer.
Tools and Equipment Required:
| Tool | Purpose |
|---|---|
| Wrenches and Screwdrivers | For tightening bolts and screws during assembly. |
| Torque Wrench | Ensures bolts are tightened to manufacturer-specified torque settings. |
| Alignment Tools | Facilitate precise alignment of the pump and motor shafts. |
| Sealant and Lubricants | Used for assembling seals and ensuring smooth operation of moving parts. |
| Cleaning Supplies | Maintain component cleanliness to prevent contamination and wear. |
Steps to Assemble the Pump Components:
- Prepare All Components: Ensure that all pump parts are clean and free from debris. Inspect each component for any signs of damage or wear before assembly.
- Install the Seal Assembly: Carefully position the seal around the shaft, applying appropriate sealant as per manufacturer recommendations to prevent leakage.
- Attach the Impeller to the Shaft: Align the impeller with the shaft and secure it using the designated fasteners. Use a torque wrench to tighten bolts to the specified torque settings.
- Mount Bearings: Place the bearings onto the shaft, ensuring they are properly seated and lubricated to facilitate smooth rotation.
- Assemble the Casing: Position the impeller and shaft assembly into the pump casing. Ensure that the flow path is unobstructed and that all internal components are correctly aligned.
- Secure the Pump to the Base Plate: Align the pump casing with the base plate, fastening it securely to provide stability and reduce vibrations during operation.
- Connect the Coupling: Attach the coupling between the pump shaft and the motor, ensuring precise alignment to prevent undue stress on the components.
- Final Inspection: Conduct a thorough inspection to verify that all connections are tight, seals are properly in place, and there are no visible gaps or misalignments.
Best Practices:
- Follow Manufacturer Instructions: Always refer to the pump manufacturer’s assembly manual to adhere to specific instructions and torque specifications.
- Maintain Cleanliness: Keep all components clean during assembly to prevent contamination, which can lead to wear or failure.
- Ensure Proper Alignment: Accurate alignment of the pump and motor shafts is essential to minimize vibrations and extend the operational life of the pump.
- Use Quality Parts: Utilize genuine or high-quality replacement parts to maintain the integrity and performance of the pump system.
- Document the Assembly Process: Record any deviations or observations during assembly to inform future maintenance and troubleshooting efforts.
By meticulously following these steps and implementing best practices, the assembly of pump components will be executed efficiently, laying a solid foundation for the subsequent phases of the installation process.
connecting the piping system
 Connecting the piping system is a pivotal aspect of the centrifugal pump installation, ensuring the seamless flow of fluids and the overall efficiency of the system. Properly integrated piping not only facilitates optimal pump performance but also minimizes the risk of leaks, pressure drops, and operational disruptions. Adhering to established guidelines and best practices during this phase is essential for achieving a reliable and durable installation.
Key Considerations:
- Pipe Selection: Choose pipes that are compatible with the fluid’s properties, including its temperature, pressure, and chemical composition. Common materials include stainless steel, PVC, and cast iron.
- Pipe Sizing: Accurately determine the appropriate pipe diameter to handle the required flow rates without causing excessive velocity or pressure losses.
- Layout Design: Design a piping layout that minimizes bends and fittings to reduce friction losses and potential pressure drops.
- Sealing and Joint Integrity: Utilize proper sealing techniques and high-quality fittings to prevent leaks and ensure secure connections.
- Valves and Control Devices: Incorporate shut-off valves, check valves, and flow control devices to manage fluid flow and protect the pump from reverse flow and surges.
- Support and Alignment: Implement adequate pipe supports and maintain precise alignment between the pump and motor to reduce stress on connections and prevent system misalignment.
- Accessibility for Maintenance: Ensure that piping connections are accessible for future inspections, maintenance, and potential repairs.
Steps to Connect the Piping System:
- Design the Piping Layout: Begin by drafting a detailed piping diagram that outlines the routes for inlet and outlet pipes, including the placement of valves, fittings, and support structures. Ensure the layout adheres to industry standards and accommodates future maintenance needs.
- Select Appropriate Pipe Materials: Based on the fluid characteristics and operating conditions, choose suitable pipe materials. For corrosive fluids, stainless steel or specialized coatings may be necessary, while for general applications, PVC or galvanized steel may suffice.
- Determine Pipe Sizes: Calculate the required pipe diameters using hydraulic calculations to match the pump’s flow rate and head requirements. Oversized pipes can lead to unnecessary costs, while undersized pipes may cause flow restrictions.
- Install Inlet and Outlet Piping: Begin by connecting the inlet pipe to the pump’s suction side, ensuring a smooth and direct flow path to minimize turbulence and cavitation risks. Similarly, connect the outlet pipe, maintaining a straight trajectory to reduce pressure losses.
- Apply Proper Sealing Techniques: Use appropriate gaskets, sealants, or welding methods to secure pipe joints and prevent leaks. Ensure that all connections are tight and free from gaps.
- Incorporate Valves and Fittings: Install necessary valves, such as gate valves or globe valves, at strategic points to control flow and facilitate maintenance. Check valves should be placed on the discharge side to prevent backflow.
- Align and Support Pipes: Use pipe supports, brackets, and hangers to secure the piping system, maintaining alignment with the pump and motor shafts. Proper support reduces vibration and stress on connections.
- Pressure Test the System: Conduct pressure testing to verify the integrity of all piping connections. This involves pressurizing the system to a specified level and checking for any signs of leakage or weakness.
- Insulate and Protect Pipes: Depending on the operating environment and fluid temperature, apply insulation to pipes to maintain temperature control and protect against external conditions.
- Finalize Connections and Verify Alignment: Perform a final inspection to ensure all connections are secure, aligned, and free from obstructions. Make any necessary adjustments to optimize flow and system performance.
Common Piping Configurations:
| Configuration | Description | Advantages |
|---|---|---|
| Vertical Piping | Pipes arranged vertically to facilitate gravity-assisted flow. | Reduces energy consumption, minimizes pressure losses. |
| Horizontal Piping | Pipes laid out horizontally to cover larger distances. | Flexibility in layout design, easier installation. |
| Looped Piping | Interconnected piping loops to provide multiple flow paths. | Enhances system reliability, allows for maintenance without shutdown. |
| Star Piping | Multiple pipes radiating from a central point. | Efficient distribution, balanced flow rates. |
Best Practices:
- Adhere to Standards: Follow relevant industry standards and local codes to ensure safety and compliance.
- Minimize Bends and Turns: Design piping paths with the fewest possible bends to reduce friction losses and potential flow disturbances.
- Use Flexible Connections Where Necessary: Incorporate flexible couplings to accommodate minor movements and vibrations, preventing stress on rigid connections.
- Ensure Adequate Ventilation: Properly ventilate the piping system to prevent trapped air and maintain consistent flow.
- Implement Redundancies: Where critical, introduce redundant piping paths to ensure continuous operation in case of a blockage or failure.
By meticulously following these steps and adhering to established guidelines, the piping system can be effectively integrated into the centrifugal pump installation. This ensures optimal fluid dynamics, enhances system reliability, and contributes to the overall efficiency and longevity of the pump operation.
testing and troubleshooting
Testing and troubleshooting are critical phases in ensuring the success and reliability of a centrifugal pump installation. Proper testing verifies that the pump operates according to specifications, while effective troubleshooting addresses any issues that arise during or after installation. Adhering to established guidelines and following systematic steps can enhance the efficiency and longevity of the pump system.
Key Steps for Testing the Pump:
- Pre-Operational Checks:
- Verify that all components are securely assembled and all connections are tight.
- Ensure that the power supply is correctly configured and that electrical connections comply with safety standards.
- Check that all valves are in the proper position and that there are no obstructions in the piping system.
- Initial Start-Up:
- Begin by slowly introducing fluid into the pump to avoid air locks and cavitation.
- Gradually increase the pump speed while monitoring for unusual vibrations or noises.
- Observe the pressure gauges and flow meters to ensure that the pump is achieving the desired performance metrics.
- Performance Verification:
- Compare the measured flow rate and head against the design specifications to confirm proper operation.
- Evaluate the pump’s efficiency by measuring input power and output flow parameters.
- Inspect for any signs of overheating or abnormal wear on components such as bearings and seals.
- Leak and Pressure Testing:
- Conduct a pressure test to identify and rectify any leaks in the system.
- Use appropriate detection methods, such as visual inspections or pressure decay tests, to ensure joint integrity.
- Address any leaks promptly to prevent damage and maintain system efficiency.
- Vibration and Noise Analysis:
- Measure vibration levels to ensure they are within acceptable limits, using vibration analysis tools if necessary.
- Identify and mitigate sources of excessive noise, which may indicate misalignment or component issues.
- Implement corrective actions, such as realigning the pump and motor or adding vibration dampers.
Common Troubleshooting Issues and Solutions:
| Issue | Possible Causes | Solutions |
|---|---|---|
| Low Flow Rate |
|
|
| Excessive Vibration |
|
|
| Leaking Seals |
|
|
| Overheating |
|
|
| Unusual Noise |
|
|
Best Practices for Effective Testing and Troubleshooting:
- Follow Manufacturer’s Guidelines: Adhere to the pump manufacturer’s testing procedures and troubleshooting protocols to ensure accurate diagnostics and maintain warranty conditions.
- Document Test Results: Keep detailed records of all tests, including parameters measured, observations, and any corrective actions taken. This documentation aids in future maintenance and troubleshooting efforts.
- Use Proper Diagnostic Tools: Utilize appropriate tools such as multimeters, pressure gauges, flow meters, and vibration analyzers to obtain accurate measurements and identify issues effectively.
- Implement Regular Maintenance: Schedule routine inspections and maintenance activities to prevent issues from arising and to detect potential problems early.
- Train Personnel: Ensure that all team members involved in testing and troubleshooting are adequately trained and familiar with the pump system and its components.
- Maintain Safety Standards: Always prioritize safety by using appropriate personal protective equipment (PPE) and following safety protocols during testing and troubleshooting procedures.
By meticulously following these steps and adhering to established guidelines, the centrifugal pump system can be effectively tested and any issues can be promptly addressed. This ensures optimal performance, minimizes downtime, and extends the operational lifespan of the pump, thereby contributing to the overall success of the installation.


